Thursday, January 17, 2013

Smoked Chicken Pot Pie


It has been unseasonably cold this winter, so I figured it was time for a warm and comforting recipe on the ole food blog this month.  And in this capacity, you can’t do much better than a good, hearty chicken pot pie. 

This dish brings back memories of youth for me, as the steam rising from the fresh-cracked pastry shell of a pot pie hot from the oven always delighted me on a cold winter day when I was a kid.  Of course, the pies in those days were usually of the frozen Swanson variety, but they did the job back then.  


Of course, we love cooking, right?  And homemade is almost always better, right?  In this case, it is right, for the fresh veggies and cream (and homemade pastry dough) in this dish will win the Pepsi Challenge with those frozen pies any day.
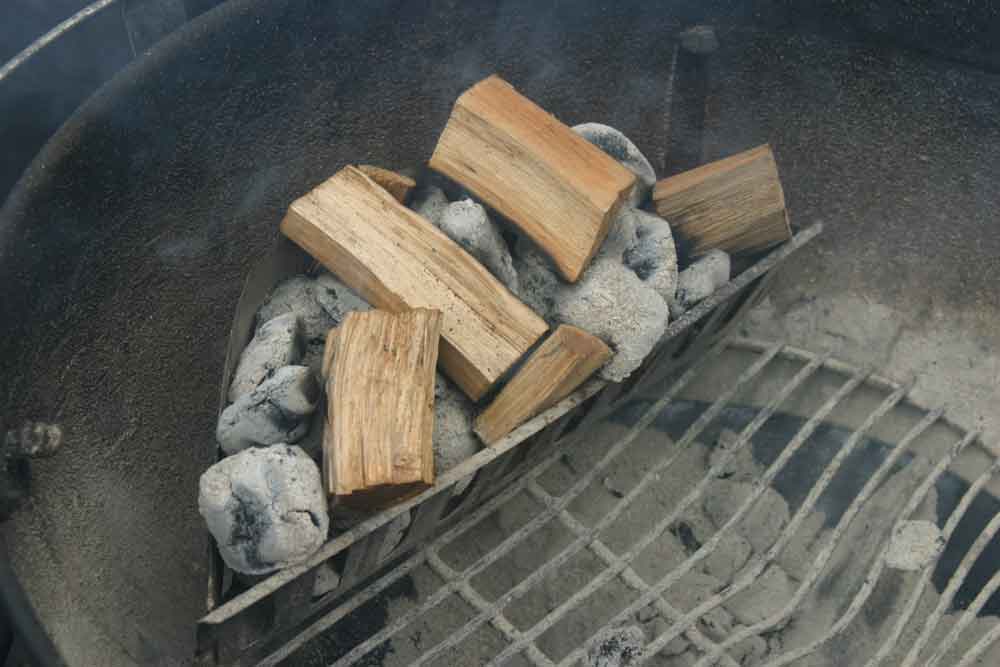
Also, this recipe amps up the flavor a few notches by using smoked chicken in the pies.  Yes, adding a tangy smoked flavor to these already creamy, buttery, savory pies really takes the flavor to a higher plane of existence.  They might just be...the best chicken pot pies you’ve ever tasted.  They are for me.
  

Pastry Dough

2.5 Cups Flour
2 Sticks Butter
2 Teaspoons Salt
2 Teaspoons Sugar
A Few Ounces Ice Water


Don’t skimp on the dough by using store-bought frozen dough.  Making your own is quick and easy and sooooo much more flavorful. 

Mix flour, salt and sugar in food processor.  Cut in butter in cubes...


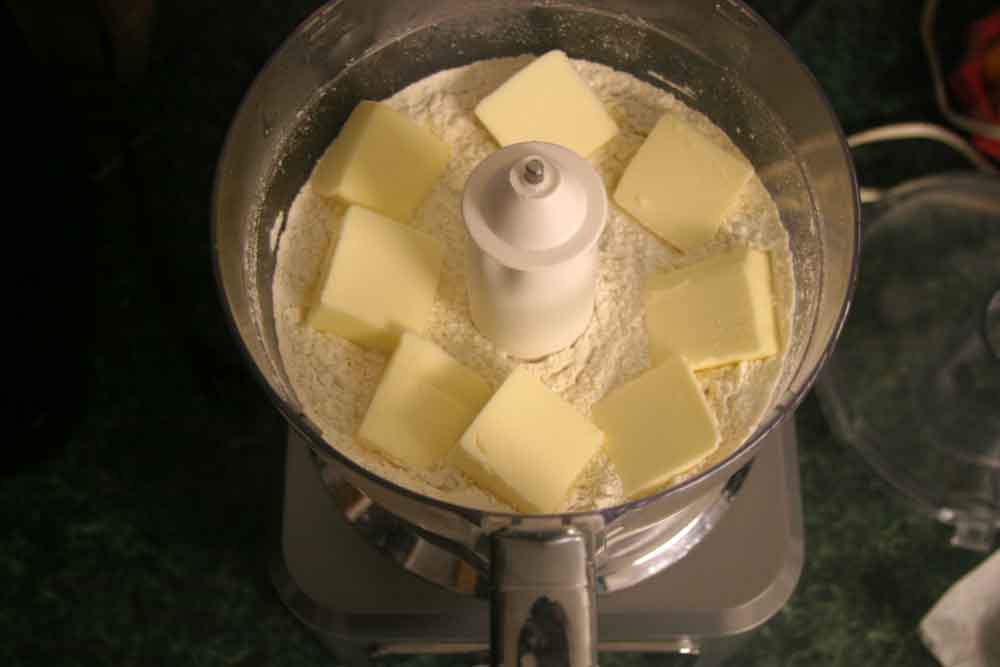
...and process until fine granules form.  Slowly add ice water in drops until dough forms.  


Wrap dough in plastic and refrigerate for at least an hour, longer of you wish.   


When you’re ready to make the pie shells, divide dough into thirds.  Roll out one third for two pastry bases, the next third for two more, and one third for all four pastry tops. 


When you roll out the bases dough, roll it into a rough rectangle, then cut in half with a knife or pizza cutter.  Take these and press each into small, straight-sided soup bowls or large ramekins.  Let excess dough drape over the edge, then cut or tear off excess dough, making sure to leave enough for the top to connect to.  


You should refrigerate the dough-filled ramekins until your pot pie filling is done.  Also, you can wait to roll out your tops until after you’ve filled the bases.  Keep top dough refrigerated until you roll it out. 


Filling

2 Smoked Chicken Breasts, cubed
2 Potatoes, chopped
3 Carrots, chopped
1 Cup Frozen Peas
Salt, Pepper and Celery salt to taste
4 Tablespoons Butter
1 Medium Spanish Onion, finely diced
3 Cloves Garlic, finely chopped
4 Tablespoons All-Purpose Flour
2 cups Heavy Cream, heated
2-3 cups Chicken Broth


Preheat oven to 400F

Chop the potatoes and carrots into half inch pieces...


...then parboil them for a few minutes. 

Sauté diced onions in butter over medium heat until they turn clear and just start to look golden. Sift in flour, salt and pepper and celery salt, let this cook for a couple minutes.


Add garlic and continue to cook for one minute.  Add the chicken stock and heavy cream.  


Stir in frozen peas, then the parboiled carrots and potatoes. 


While this is cooking, cube your smoked chicken... 


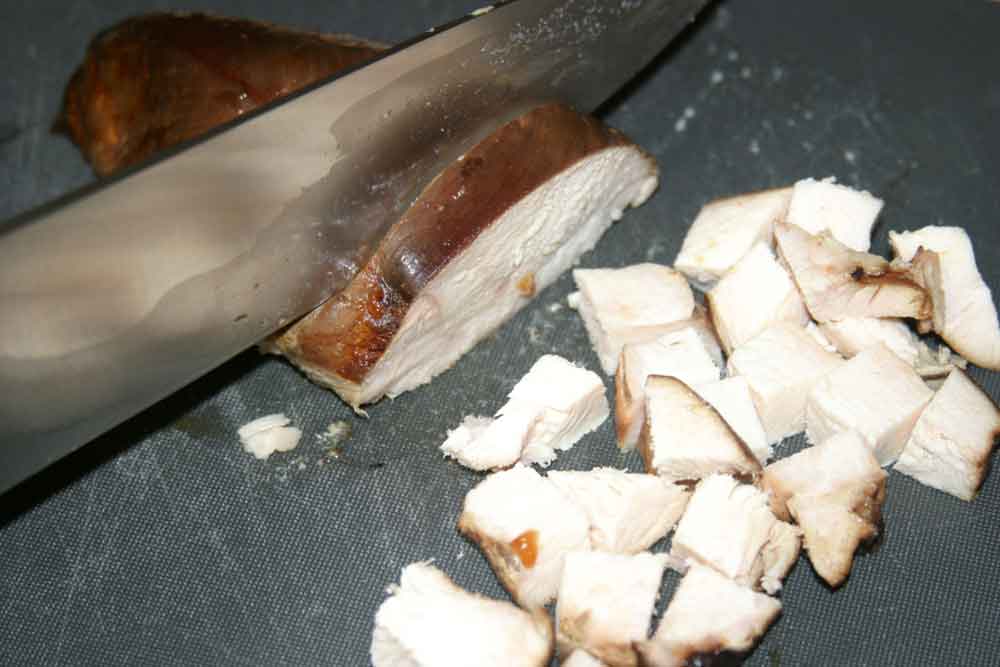
...and then stir it in.  Let mixture simmer for 10-15 minutes. 

Retrieve your ramekins with the pastry dough bases inside, then ladle your chicken mixture into them.  Make sure you get several pieces of chicken into each ramekin.  


Add another circle of dough on top.  Seal with fork. 


Carefully tear off excess dough. 


(Note, if you wish, you can leave the extra dough draped down the sides.  The pie will bake fine, and you'll have extra crust to munch)

Cut slits in surface of pie so steam can escape while the pies are baking.  


Bake for 35-40 minutes, until crust is golden brown.


Serve immediately.

Until next time, 

Here's hoping for a chicken in every pot.

Chris

Saturday, January 12, 2013

Smoked Chicken Breasts


There are a myriad of ways to smoke chicken:  whole, halved, spatchcocked, cut in pieces, sauced, skin on, skin off, bone in, bone gone, sittin’ on a beer can, etc.  But for simple, unadorned smoke flavor, a boneless, skinless chicken breast is your huckleberry.  I usually buy them in large packages when they are on sale at the grocery store and smoke the whole lot of them, then freeze them for use in a myriad of other recipes later on, such as Smoked Chicken Pot Pies, Smoked Chicken Fajitas, or Smoked Chicken Pizza.  My wife even makes a killer Smoked Chicken Salad with ‘em.  They are as versatile as they are tasty.  Hell, you can even serve ‘em on their own with just a little BBQ sauce and some simple sides. 

As to smoking woods, I would say just about anything but mesquite will work for this technique.  My preferences are any of the fruit woods, maple, pecan or hickory.  In fact, if you're new to smoking or are trying a new smoking wood that you have never used and you want to taste the unadulterated smoke flavor without tastes from what you are smoking dominating your palate, then this recipe twill serve.  The chicken flavor on its own is so subtle that the majority of what you taste is the smoke.  When I try a new wood I’ve never used before, I always use this technique so I can get a good feel for the taste of that particular wood. 
It is for this reason that I don’t really season the breasts at all before I smoke them.  I’m just trying to impart smoke flavor and nothing else.  Since I mainly use this technique for chicken that goes into other recipes, I do my seasoning later, when I know what I’m making, and not in the smoker. 

So, how do we do it?  Simple.  Get your smoker going according to whatever technique you use.  Lately I’ve been using my Weber kettle to smoke in, so I get about a half-chimney of charcoal going, dump it in my indirect heat tray, then add my wood on top.  


Do I soak the wood?  Yes, for a few minutes.  What does this do?  Not much.   Wood doesn’t really absorb water, but it does delay the onset of flame-up until I get the lid on the smoker, so I do it. 

Let the breasts smoke for about 45 minutes to an hour at the rather warm smoking temperature of 300F.  Chicken is very moist and porous, so it will absorb the smoke flavor readily, and you can easily over-smoke it if you leave them in longer than an hour.  But, you do want to cook your breasts to 160F, so check them with a meat thermometer at the 45 minute mark, and continue to cook only if they haven’t reached that temp.  Don’t go much over 160F or your chicken will start to dry out.  You can even pull them at 150F or so and they will continue to cook until they reach 160F.


Once the breasts are done, you can vacuum-seal them and freeze them whole for later use, or use them immediately.  


Until next time, 

Smoke 'em if you got 'em.  

Chris


Saturday, December 29, 2012

Cowboy Beans


Anyone who knows me knows I like my chili Texas style, and that means no beans.  But that doesn’t mean I don’t like beans.  I love 'em.  Just not in my chili.  But beans, on their own, are wonderful things, and lend themselves to a myriad of dishes.  They have some nice flavor on their own, but also hold up well to spices and other flavor additions.  And that’s where this recipe comes in. 

Like chili, beans were a staple in a cowboy’s diet while on the range, and this dish is prepared with many of the same spices that one would find in a proper chili dish.  This recipe is similar to the commercial product called ‘Ranch Style Beans,’ but with the flavor kicked up a few notches more. 

This is also a recipe that lends itself to camp fire cooking in that most ubiquitous of all camp cooking items, the Dutch oven. 


If you don’t have one, any pot will work, but the even heating properties of a cast iron Dutch oven work well for the long, low and slow cooking times required to make these beans shine. 


Cowboy Beans

1 lb Pinto Beans
1 small onion, chopped
5 cloves Garlic, peeled
½ oz dried Ancho chilies, rehydrated and pureed
7 oz Ground tomatoes
1.5 oz Tomato paste
1 tblsp apple cider vinegar
6.5 oz Beef stock
¼ cup chili powder
1 tsp paprika
1 tsp smoked paprika
1 tsp cumin
1 tsp oregano
1 tsp dried mustard
1 1/3 oz Better than Bullion base paste
1 tsp salt
2 oz Jalapeno sauce (optional)
Water, enough to top up and cover beans by ½ inch
1 tsp vegetable or olive oil

(note, in the pictures that follow, I’m making a quadruple batch, so I’ll have lots left over for freezing)

Sort beans and discard any weirdos.  Soak beans overnight.  


Drain beans in colander and rinse.  Add to your pot or Dutch oven and set aside.   (note, discard the soaking water and use fresh water for cooking the beans)


Chop onion and sauté until soft, clear and slightly browned.  


Add onion to beans when they’re done.

While onions are simmering, remove the stems and seeds from the dried Ancho chiles. 


Boil a pint or two of water and add the Ancho chilies.  Let them boil for 5 to 10 minutes until soft.  Remove them from the water and place in food processor with peeled garlic cloves.  


Add a bit of the reserved Ancho chile liquid.  Process until smooth paste forms.  


If necessary, add a more of the Ancho chile liquid, a little at a time, until all the bits of garlic and chile are smoothly processed into a paste.  Add this paste to the beans. 


Next add the ground tomatoes and tomato paste to the beans, as well as the apple cider vinegar and beef stock.  

Top up the remaining Ancho chile water with enough additional water to make about a quart of liquid.  To this add the chili powder, paprika, smoked paprika, cumin, oregano, mustard, salt and bullion base paste.  Stir until spices are evenly suspended in the liquid and the paste is dissolved.  Add this to the beans.  If using, add jalapeno sauce.  Top up with enough water to cover beans by about a half inch.


If cooking in oven, set it for 275F and cook beans for 6-8 hours, until tender and flavorful.  Stir every couple hours. 

When I cook a 4 lb batch in my large Dutch oven, I can’t fit it in my stove, so I do things ‘cowboy style,’ as if I were camping out or on the trail.  I fire up about a half chimney of charcoal, place half of it in the base of my Weber kettle, place the Dutch oven on top...


 ...and then place the remaining coals on the lid of the Dutch oven.  


I then open the dampers fully on the Weber, and place the lid loosely on top.  I let cook for 3 hours, add more charcoal, then cook for another three hours, for six hours total.   


Carefully remove the lid of the Dutch oven, so as not to get any ashes in your beans, and taste the beans.  If there is still some firmness to them, let them cook another hour or two.  If they are soft enough for you and the flavor seems right, serve away. 


 Here we've served the beans with some simple grilled Flat Iron steak.


And so, there you have it.  A great way for a Texan (or anyone else) to enjoy their beans.  (We'll discuss that chili on another day) 

Until next time, 

Happy trails, pardner!


Chris


Wednesday, November 14, 2012

Cloverleaf Rolls


Thanksgiving approaches, that greatest of all cooking and baking holidays, so I thought I’d make this month’s update relevant to this, my favorite of holidays.

With all the food that Thanksgiving entails—turkey, dressing, gravy, veggies, salads, desserts, etc, it’s easy for things like bread to become an afterthought.  To help manage a busy kitchen, frozen or canned rolls or biscuits are often pressed into service to simplify matters.  Baking fresh bread for the holidays just seems so time consuming in an already time-crunched day.  Well, it shouldn’t, ‘cause there’s nothing that puts an accent on your majestic meal like fresh-baked bread.  It fills the house with a savory, mouth-watering scent, it warms to the touch, and, slathered with creamy melted butter, the taste is out of this world. 

So this year, why not take a little extra time (and with this recipe, a little is all you’ll need) and wow ‘em with these wonderful and easy-to-make Cloverleaf Rolls.   Because even though adding fresh-baked bread to your Thanksgiving table can seem time consuming, mainly because of the hours between start to finish, the actual hands-on time is slight (most of the time is allowing the dough to rise), so you can work the prep into your cooking schedule quite easily. 


Cloverleaf Rolls

3 Cups Bread Flour
1 Cup + 1 Ounce Warm Water
1 Tablespoon (or one packet) Active Dry Yeast
1 Large Egg
3 Tablespoons + 1 Tablespoon Melted Butter
3 Tablespoons Powdered Milk
2 Tablespoons Sugar
2 Teaspoons Salt

Add the flour, powdered milk, salt and sugar to mixing bowl and give a few stirs to incorporate.  Add your dry yeast to the cup of warm water and let sit for a few minutes for the yeast to start working.  Then add the yeast water mixture, egg and 3 tablespoons of the melted butter to the flour mixture and mix, preferably in a mixer with a dough hook, until all is incorporated into a cohesive dough ball.  If necessary, use the extra ounce of water, adding it a little at a time to the mixture if there is not enough moisture to moisten the dough properly.  Only add this if necessary, you don’t want the dough to be too moist...it should have some firmness to it. 


Once the dough ball is incorporated, continue to run the mixer on setting 2 for about seven minutes, moderately developing the glutens in the dough. 

Next, place the dough in an oiled container, cover, and let sit for one and a half hours to rise. 


At this time, you’re ready to make the rolls.  Divide off a piece of dough of about 20 grams and roll it into a ball.  If you don’t have a kitchen scale, the amount of dough you need should be enough to make about a 1 inch ball.  


Make two more balls, then place the three into the greased cup of a muffin tin.  


Repeat the process until you’ve used up all your dough. 


This recipe should make about 18 rolls.  Doubling it will give you enough dough to fill three 12-cup muffin tins, just about perfect for a grand holiday gathering. 

Let the unbaked rolls rise again in the muffin tins for at least an hour and a half, but preferably three hours or so.  The longer you go, the better rise you will get, and more flavor with develop.  


After the rise, brush the rolls with melted butter, then bake in a 400F oven for 15 minutes, or until golden brown.  Remove from oven and, if desired, brush with additional butter.  Serve immediately. 


These rolls are best served hot (with lots of softened butter, of course!), so I usually don’t bake them until right before I’m serving my holiday dinner.  But they bake fast, and can be turned out into a bread basket quickly, so this is never a problem.  I use the convection setting on my oven, which bakes them even faster, usually in around 10 minutes at 350F (Convection Bake)


Until next time,

Bake some bread!

Chris