Monday, June 17, 2013

Tomato Phyllo Tart


As many of you know, I love pizza in all its infinite varieties, and while this dish certainly looks like a pizza, and slices like a pizza, I’m going to claim that it is most definitely not a pizza, but a tart.  


I claim this because we’ve subtracted from the mix one of the defining things that makes a pizza a pizza: the bready crust. 

What we’ve replaced it with is that wondrous but finicky food item from Greece known as phyllo dough, a paper-thin pastry dough meant to be layered to make a number of tasty pastries and sweet treats.  Of course this tart is savory, so we’ll be skipping the sweet.  It is certainly pizza-like, but the overall dish has more of a Greek feeling and flavor than an Italian one, mainly because of the phyllo, but also due to the selection of toppings.

A word of warning:  Phyllo dough can be notoriously difficult to work with if you don’t prepare properly.  It usually comes frozen, so it first must be thawed properly.  The only way to do this right is several hours in the fridge.  If you just set the dough out on the counter, it will thaw too quickly and become mushy.  If you don’t thaw it long enough it will be too brittle to unroll.  Add to this the fact that even perfectly thawed dough will dry out quickly when you leave it on the counter, and phyllo dough can be daunting indeed. 

But, it is a very rewarding ingredient when used properly, so don’t be daunted, and give it a try.  Just thaw it several hours in the fridge, roll it out carefully, and keep it covered with plastic wrap or a damp towel when you’re doing other things and you should be fine. 


Tomato Phyllo Tart

12-14 Sheets Phyllo Dough, thawed
1/3 Cup Extra Virgin Olive Oil
1/3 Stick Butter
1/4 Cup Breadcrumbs
4 oz. Prepared Pesto
1 8 oz. Block Feta Cheese
2 oz. Crumbled Feta Cheese
2 Roma Tomatoes, Sliced into Thin Slices
Several Kumato or other Small Tomatoes
1/3 Cup Kalamata Olives
Fresh Basil

Preheat oven to 400°F.

After thawing your phyllo dough properly (see above) unroll it 


and place one sheet on a greased or parchment paper-lined baking sheet.  Melt the butter and blend with the olive oil.  Brush the phyllo sheet with the butter/olive oil mixture.   


Sprinkle this with a light sifting of breadcrumbs.  


Layer another phyllo sheet on top of this.  Brush this sheet with the pesto mixture.  


Continue layering the phyllo sheets one after the other, alternating the butter/oil/breadcrumbs with the pesto.  Continue until all the sheets are used.  Make sure you spread the last layer with a good helping of the pesto mixture. Fold the edges over to make a half-inch crust. 


Slice the block of feta into thin slices and layer them onto the tart.  


Next, layer on the Roma tomatoes, leaving some space between them.  


You will then fill this space with the smaller Kumato Tomatoes or whatever small tomato you are using. 


Next, spread your Kalamata olives liberally about the tart, then finally sprinkle on the feta cheese crumbles. 


Bake in the 400°F oven for 30-40 minutes, keeping an eye on it and taking the tart out when the phyllo crust turns a golden brown and is crispy. 


(The delicate layers of the phyllo dough make a delightful, light crust)

Allow to set for about five minutes, then slice and serve with some of the shredded fresh basil. 


Until next time,

Opa!

Chris


Sunday, May 19, 2013

Buttermilk Ranch Dressing


Ranch is about the most ubiquitous dressing in the world today.  Take a quick glance at the salad dressing aisle at the grocery store and you will find a veritable sea of ranch dressings, replete with different brands, different variations, and different flavor combinations.  Sadly, most of them are at best quite bland, and worst case, downright unpalatable. 

It wasn’t always like this.  There was a time when ranch dressing was meant to be made fresh at home, without the preservatives, artificial flavorings, etc that appear in the bottles (and even the seasoning packets) on your grocer’s shelves. 

Ranch dressing was indeed invented on a dude ranch, the Hidden Valley, in the early fifties by the owners of the ranch.  


It proved quite popular, and the ranch began selling bottled versions, then later, a packet of seasonings meant to be mixed with buttermilk and other fresh ingredients at home. 

Ranch really took off in the Eighties, when Americans began slathering it on everything from French fries to breadsticks to cute little cut-up veggies served on party trays.  The problem is that in order to make a more shelf-stable product, the recipe in the commercial version of ranch dressing has devolved over time so that, yes, it probably has the shelf-life of canned Spam, but all this at the expense of flavor and freshness.

Well, I’ve got good news for ya, ranch lovers.  You can make your own ranch dressing at home in minutes with fresh, natural ingredients and it will have a taste like you will not believe.  It will be the most tangy, savory, succulent ranch dressing you have ever had. 


Buttermilk Ranch Dressing

1 Cup Well-Shaken Buttermilk
½ Cup Mayonnaise
½ Cup Sour Cream
3 Tablespoons Chopped Italian Parsley
3 Tablespoons Chopped Fresh Dill
2 Tablespoons Chopped Fresh Chives
1 Tablespoon Onion Powder
1 Teaspoon Granulated Garlic
1 Whole Garlic Clove, Crushed
1 Tablespoon Worcestershire Sauce
1 Teaspoon Lemon Juice
½ Teaspoon Kosher Salt
¼ Teaspoon Ground Black Pepper

Add your wet ingredients to a food processor and pulse to incorporate.  


Make sure you use real Mayo for this and not Miracle Whip or a similar Salad Dressing. Also, get the best, freshest buttermilk you can find. 

Next, add your fresh herbs and then the dry ingredients.   


Run the food processor for 30 seconds to a minute, just until the herbs are chopped up finely and nicely 
incorporated.  


Taste the concoction and adjust as necessary with additional salt or herbs. 

Seal up the dressing in a Mason jar or similar and refrigerate a few hours to let the flavors meld.  


Then serve away.  The dressing should stay fresh and tasty for three to four days in your fridge. 

Here we’ve served it with a nice Flatiron Steak salad.


Until next time,

Happy Trails, Pardners!


Chris


Tuesday, April 30, 2013

Kalua Pork


Kalua Pork is the dish de rigueur at a Hawaiian Luau.  Here, the porcine guest of honor is wrapped in Ti or banana leaves and roasted all day long in an Emu, which is basically a hole in the ground lined with hot lava rocks.  In this primitive oven, the entire pig, usually seasoned only with salt, slow roasts to perfection. 

Since you probably don’t have a whole pig, lava rocks, or even a hole in the ground, I offer you this much simpler version that will achieve some delicious results. 


First, you’re gonna start with a couple pork butts, also known as pork shoulder, since it comes from the shoulder of the front leg of the pig, and not the rear.  Make sure you get good pork from a quality butcher, and don’t go for the discounted stuff that is nearing or past its sell-by date.  Kalua pork is hardly seasoned at all, so if the pork has started to turn, there won’t be anything to cover up the off flavors.

Now, If you want to be uber traditional, do nothing more to them than season the pork butts with some coarse sea salt and let sit for a couple hours.  I go a step further, however, and also rub the butts with some paprika and granulated garlic, then I add the salt. 


Now, spiced rubs are getting into the area of Carolina-style pulled pork, which is the other great use for a whole pig. (East Carolina, anyway)  But I couldn’t resist adding a basic rub to my version, because it forms such a wonderful bark that will add lots of flavor to the finished product.  Don’t worry, this version is still ‘Kalua’ in temperament, and the flavors from the rub are subtle, allowing the traditional salt flavor and the flavor from the pork itself to shine though. 


After the butts have sat with the rub a couple hours, fire up your smoker with the wood of your choice and let it settle in at around 225 degrees Fahrenheit.  Now, as to what wood to use?  Personally, I use a fruit wood like apple, which I think goes wonderfully with pork.  There are a couple other options, however.  Remember, in the traditional Kalua Pork, the only smoking that occurs is from the slow burning of the Ti leaves, and this is at best a very subtle flavor, so using a smoking wood like apple is a good choice.  Hawaii does have a native smoking wood that is used quite a lot over there.  It’s called Kaiwe, and it is related to Mesquite.  (The wood that is ubiquitous with many areas here in Texas)

Now, you can order Kaiwe from Hawaii, (or just use Mesquite), and that might make you feel like you’re being authentic, but keep in mind that both of these woods are quite pungent and strong.  Despite being a native Texan, I rarely if ever use Mesquite for anything.  It’s just too harsh and gives things an oversmoked flavor.  So, for this subtle Kalua pork dish, just go with a fruit wood and you can’t go wrong.

Smoke the butts at 225F for about 4-5 hours, until a good bark starts to develop.  At this point, you’ve got about as much smoke flavor as you’re going to get, but, the pork is nowhere near done.  


Pork shoulder, like beef brisket, needs long, low and slow cooking times to turn the tough connective tissue of the butt into tender, flavorful meat. 

At this point, I transfer the butts into a foil pan, 


cover with foil, and slow roast them in my oven at 180F for an additional 12 hours or more.  This will break down all that tough collagen in the muscle, which will turn into a nice juice that the butts will sit in and remain moist.  


The pork, after twelve hours in the oven.

You could continue to cook the butts in your smoker for the additional time, but if you do, I’d wrap them tight in foil.  This helps prevent the juice from releasing and dripping away, which will dry out the pork, and it also keeps them from getting oversmoked, which can happen with such a long cooking time in the smoker. 

Once the pork is done, I usually cool the butts in the fridge for a few hours before I pull it into shreds.  It’s just too hot right out of the oven.  My cooking schedule usually goes like this.  I smoke the butts the day before I ‘m going to serve them, roast them in the oven over night, then put in the fridge until dinner time.  I then pull them apart (making sure to mix in chopped pieces of the bark) 


and reheat and serve. 

Here we’ve served some with traditional Hawaiian Macaroni Salad and some of my wife’s coleslaw. 


Replace the slaw with steamed rice, and you’ve got a traditional Hawaiian plate lunch, served throughout the islands. 

Until next time,

Aloha Oe!

Chris

Monday, April 22, 2013

Hawaiian Macaroni Salad


When one thinks of the tropics, many things come to mind, not the least of which is the delicious food to be found there.  Fresh fruits, fish, roast Kahlua Pork, macadamia nuts, the list goes on and on.  One thing that you wouldn’t expect is macaroni salad.  This dish seems more at home at a church picnic or box social, but when you visit Hawaii, you will find the Hawaiian version of mac salad all over, from the fanciest luau to a plate lunch at the most decrepit of local beach shacks, it is ubiquitous.   

It’s also really good, better than its mainland cousin, methinks, and it is strangely addictive. 

In celebrating our recent excursion to Hawaii, I thought I’d investigate this dish and bring my own version to you here on the Eat’n Man Blog.


Hawaiian Macaroni Salad


16 oz elbow macaroni
1/4 cup apple cider vinegar
1 cup whole milk
1 cup mayonnaise
1 tablespoon Worcestershire sauce
2 teaspoon brown sugar
teaspoon granulated garlic
teaspoon onion powder
2 green onions
1 carrot
1 celery stalk, minced
Salt
Pepper

Boil the elbow macaroni for a good 12-15 minutes and then drain.  


Yes, I know this sounds like a long time, but Hawaiians boil their macaroni to a pretty soft consistency, and you want to be authentic, don’t you? 

While your pasta is boiling, make the sauce.  


Combine the milk, mayo, Worcestershire, brown sugar, garlic, onion powder, salt and pepper and stir to mix.  Set aside. 

Once your pasta is drained, mix it with the apple cider vinegar 


and then place it in the fridge for about ten minutes to cool.  Then add about half of the milk/mayo mixture to it and allow it to cool for another ten minutes. 

While the pasta is cooling, chop your celery rib, carrot and green onions, 


then place them in a food processor and pulse into they are nicely minced. 


After the pasta has cooled a total of twenty minutes, add the rest of the milk/mayo mixture, then the minced veggies, and stir to combine.  


Taste and adjust with additional salt and/or pepper to taste.  Refrigerate for an hour or so to allow the flavors to meld.  Serve cold.


Until next time,

Aloha,

Chris

Sunday, March 17, 2013

Shrimp Creole


I first visited New Orleans over twenty years ago, and I fell in love with the place.  I loved the music, the easy-going attitude of the people, but most of all, I loved the food. 

Shrimp Creole happens to be the first dish I tried on my first day in NOLA, and I was mad for it.  I always make sure to get a dish or two of it every time I go back to the Big Easy.  But, strangely enough,  I’d never attempted to make it myself.  I decided to remedy that recently. 

This recipe is a modification of a version from one of the old 1950s Culinary Arts cookbooks that I collect.  (They’re where a lot of the retro art on this blog comes from)  


I snooped around the internet a little as well, then finally just modified to taste.  Be forewarned, this is a pretty spicy version.  Back off on the hot stuff if your palate is a bit more delicate.


Shrimp Creole

2 lbs Fresh Shrimp, peeled and deveined
2 Tablespoons Butter
1 Tablespoon Vegetable or Olive Oil
1 Onion, Chopped
2 Garlic Cloves, minced
2 Stalks Celery, Chopped
1 Large Green Pepper, Chopped
1 28 oz Can Chopped or Ground Tomatoes
1 6 oz Can Tomato Paste
2 Tablespoons Creole Seasoning (such as Tony Chachere’s)
2 Cups Shrimp Stock (recipe here)
2/3 Cup White Wine
¼ Teaspoon Cayenne Pepper
1 Tablespoon Black Pepper
1 Tablespoon Paprika
2 Tablespoons Tabasco Sauce
2 Tablespoons Worcestershire Sauce
1 Teaspoon Dry Thyme
Salt to taste
Green Onions, Chopped

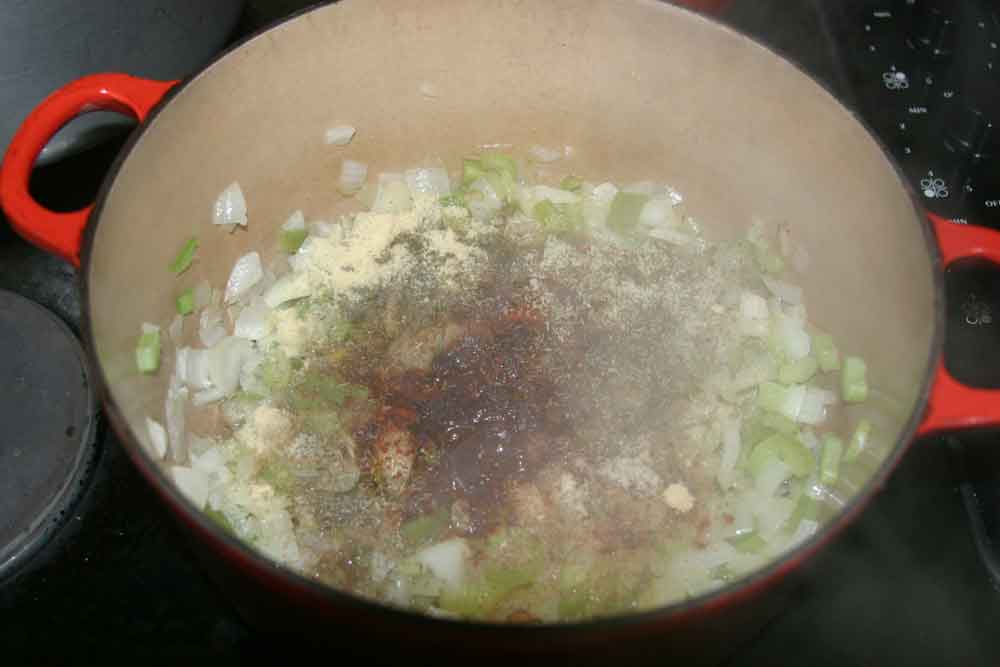
Sauté onions in the butter and oil until they begin to brown.  Add celery, green pepper, garlic and Creole seasoning. Cook a few minutes more. 


Add the tomatoes and tomato paste and cook a few minutes more.  


Add white wine, cook for two minutes.  Add shrimp stock, cayenne and black peppers, paprika and dry thyme.  Bring to a boil, then reduce to a simmer and cook for 30-40 minutes. 

After it has cooked for 30-40 minutes, add the Tabasco and Worcestershire sauces and salt to taste. 

Most Shrimp Creole recipes I’ve encountered tell you add your raw shrimp to the Creole at this point and cook until done.  I’ve decided to sauté my shrimp separately, then add them to the dish right before I serve it.  


The reason is, I find it difficult to control the cooking of the shrimp if I just add them to the Creole.  The chance of overcooking them until they are rubbery, or undercooking them, is too great.  So I just sauté the little shrimpies in a separate skillet with a bit of butter and oil until they are pink, then add them to the Creole, stir and serve. 


Add some of the chopped green onions over the top and you’re ready to serve.


Here we've served it over some basic white rice.  A Creole rice would also be appropriate.  

Until Next time,

Laissez les bon temps rouler!