Growing up in Texas, I was lucky to be surrounded by some of the finest Mexican and Tex-Mex cuisine in existence. Once a week our family used to dine out at little Mom and Pop Mexican restaurants (or sometimes just the local El Chico) and I always loved me some cheese enchiladas.
We never had them at home--Mom didn't venture too much beyond tacos with her Mexican cooking, but about 20 years ago I was lucky enough to taste some truly magnificent homemade enchiladas made by a friend's mother-in-law, who happened to be from Mexico. I had a party coming up, and thought I'd like to try my hand at making them, so I asked her for the recipe. Not only did she give it to me, but she gave me a demo session at my friend's house. This made all the difference in the world, for enchiladas are relatively simple when it comes to ingredients, but the technique makes all the difference in the world.
My version is traditional in technique, but ingredient-wise I've tweaked the recipe over the years, adding a store-bought sauce as my base, explained below. But without a doubt, these babies come out tasting great and are always a hit at our Tex-Mex Christmas Eve dinner we have every year.

The recipe below will make one sheet pan full of enchiladas--you can usually get about 20 on a pan if you roll them tight. I usually make these for parties, so I will double or sometimes even triple the recipe.
Two codicils: 1) try to get the best corn tortillas you can--grocery store torts, which are laden with preservatives and whatnot, don't cut it. Use those and your enchies with come out coarse and dry. I usually get mine from a little mom and pop tortillaria called La Nueva near me. The best tortillas are soft and pliant and flexible. 2) Go with only Old El Paso brand sauce as your base. I've tried others, and they don't have the same flavor component that is a signature of my version. I used to make my own sauce, but even that, while good, lacked what I was tasting in the Old E.P. sauce. There is some flavor additive in this canned sauce which I love, it is sort of a tangy, savory, buttery flavor that no other canned sauce has, and I can't figure out how to replicate it from scratch. The Old E.P. sauce is, however, rather bland on its own (other than that flavor I like) so I doctor it up with some spice additions to make it my own. Oh, and codicil 3) I use the traditional medium, lard, to soften to the tortillas.

Yes, I know, lard is sorta bad for you, but you only really use a small amount and we don't eat these on a daily basis, so you'll be fine. (and if you use authentic tortillas, they already have a small amount of lard in them anyway) If you'd rather, use vegetable oil, but they won't taste as good. But definitely do the softening step. If you don't, the tortillas will tear when you roll them and they will also soak up too much sauce and become mushy when you bake them. Lard can be hard to find, but I usually can find it at Mexican or Gourmet grocery stores near me.
Anyhoo, here's how to make them:

Ingredients
20 Fresh-made Corn Tortillas
24 oz Shredded Cheddar
24 oz Shredded Monterrey Jack
1 Small Onion, minced fine
28 oz Old El Paso Red Enchilada Sauce
1 tablespoon Chili Powder
2 teaspoons Granulated Garlic
1 teaspoon Smoked Paprika
1/2 teaspoon Cumin
1 small can sliced Black Olives
Lard or Vegetable Oil for softening tortillas
Directions
Preheat oven to 300F
I usually set up a sort of assembly line, with the stove in the center, with a small skillet for the lard and a shallow saucier pan for the enchilada sauce.

Heat lard in small skillet to medium hot. (325F if you have a thermometer)
Heat enchilada sauce in low sided sauce pan. Mix chili powder, garlic, cumin and paprika into enchilada sauce.

Mix cheddar and Monterrey Jack cheese in large bowl

I usually mince the onion very fine, as I don't like big chunks of onion in my enchies. I find the infamous Slap Chop device does a great job mincing the onion quickly, but a plain old knife will work fine.


Here's a pic of my assembly line. Tortillas are stacked at the top, then the lard skillet, then the sauce, then a rolling station with a paper-towel lined plate where I do the rolling. This is really a two-person job. One person dips and sauces the tortilla and the second does the rolling. It can be done by one person, but it's a bit harder.

Another handy tip, when working with the tortillas, you need something to dip them into the hot oil and sauce. Tongs will work, but they can tear the tortillas if you're not careful. Our solution--we have these chef-sized chop sticks from The Wok Shop in San Francisco.

They're supposed to be used for stir fry, but we've re-purposed them here for dipping tortillas. They work great, as you'll see below.
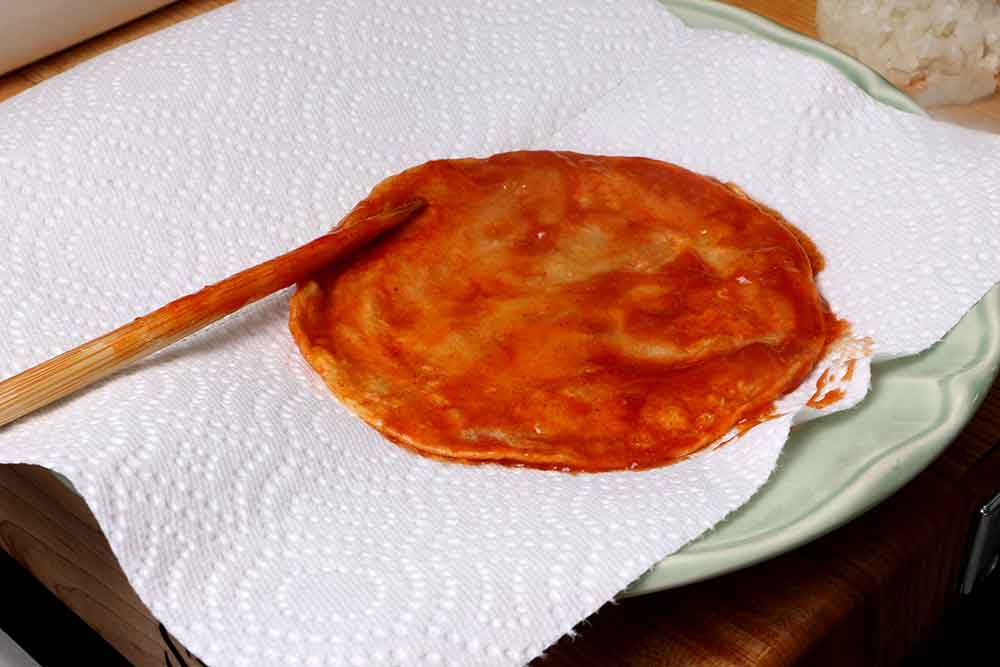
Dip the tortillas, one at a time, in the hot oil for 10 seconds or so to soften.

Next, lift the tortilla out of the oil with the chop-stick (or tongs). Note how easy it is to get out with the chop-stick...you just sort of let it drape over the stick.

Dip the softened tortilla into the red sauce to coat both sides

Place tortilla on flat surface or rolling plate
Grasp about 2 oz of the cheese mixture,

And place it on the tortilla in a little line just off center. Oh, you probably noticed I'm using food prep gloves for rolling duty.

Yes, they are great for this, as they keep your hands from getting too messy, but mainly they are for protection---the tortillas get quiet warm from the oil and sauce so the gloves keep your hands cool.
Sprinkle a bit of the minced onion to taste along the row of cheese and roll the tortilla up.

Into a tight roll.

Place on large sheet tray. Repeat, over and over again, arranging the enchies on the pan in two rows.

Repeat until tray is full. Ladle remaining sauce over enchiladas. Take care to coat the edges of each enchie first, as these areas can tend to dry out. Otherwise just a splash of the sauce over the middle of them--they are already quite saucy from the dipping, and you don't want 'em swimming in the sauce.

Sprinkle with remaining cheese

Place an olive slice on each enchilada.

These are mainly decorative, but they serve the purpose of marking each enchie so you can serve one or two at a time.

Cover with foil and bake for 25 minutes at 300F
Serve immediately or keep warm until ready to eat.

Until next time,
Adios, Amigos!