Kalua Pork is the dish de rigueur at a Hawaiian
Luau. Here, the porcine guest of honor
is wrapped in Ti or banana leaves and roasted all day long in an Emu, which is
basically a hole in the ground lined with hot lava rocks. In this primitive oven, the entire pig,
usually seasoned only with salt, slow roasts to perfection.
Since you probably don’t have a whole pig, lava rocks, or
even a hole in the ground, I offer you this much simpler version that will
achieve some delicious results.
First, you’re gonna start with a couple pork butts, also
known as pork shoulder, since it comes from the shoulder of the front leg of
the pig, and not the rear. Make sure you
get good pork from a quality butcher, and don’t go for the discounted stuff
that is nearing or past its sell-by date.
Kalua pork is hardly seasoned at all, so if the pork has started to
turn, there won’t be anything to cover up the off flavors.
Now, If you want to be uber traditional, do nothing more
to them than season the pork butts with some coarse sea salt and let sit for a
couple hours. I go a step further,
however, and also rub the butts with some paprika and granulated garlic, then I
add the salt.
Now, spiced rubs are getting into the area of
Carolina-style pulled pork, which is the other great use for a whole pig. (East
Carolina, anyway) But I couldn’t resist
adding a basic rub to my version, because it forms such a wonderful bark that
will add lots of flavor to the finished product. Don’t worry, this version is still ‘Kalua’ in
temperament, and the flavors from the rub are subtle, allowing the traditional
salt flavor and the flavor from the pork itself to shine though.
After the butts have sat with the rub a couple hours,
fire up your smoker with the wood of your choice and let it settle in at around
225 degrees Fahrenheit. Now, as to what
wood to use? Personally, I use a fruit
wood like apple, which I think goes wonderfully with pork. There are a couple other options,
however. Remember, in the traditional
Kalua Pork, the only smoking that occurs is from the slow burning of the Ti
leaves, and this is at best a very subtle flavor, so using a smoking wood like
apple is a good choice. Hawaii does have
a native smoking wood that is used quite a lot over there. It’s called Kaiwe, and it is related to
Mesquite. (The wood that is ubiquitous
with many areas here in Texas)
Now, you can order Kaiwe from Hawaii, (or just use
Mesquite), and that might make you feel like you’re being authentic, but keep
in mind that both of these woods are quite pungent and strong. Despite being a native Texan, I rarely if
ever use Mesquite for anything. It’s
just too harsh and gives things an oversmoked flavor. So, for this subtle Kalua pork dish, just go
with a fruit wood and you can’t go wrong.
Smoke the butts at 225F for about 4-5 hours, until a good
bark starts to develop. At this point, you’ve
got about as much smoke flavor as you’re going to get, but, the pork is nowhere
near done.
Pork shoulder, like beef
brisket, needs long, low and slow cooking times to turn the tough connective
tissue of the butt into tender, flavorful meat.
At this point, I transfer the butts into a foil pan,
cover with foil, and slow roast them in my oven at 180F for an additional 12
hours or more. This will break down all
that tough collagen in the muscle, which will turn into a nice juice that the butts
will sit in and remain moist.
The pork, after twelve hours in the oven.
You could
continue to cook the butts in your smoker for the additional time, but if you
do, I’d wrap them tight in foil. This
helps prevent the juice from releasing and dripping away, which will dry out
the pork, and it also keeps them from getting oversmoked, which can happen with
such a long cooking time in the smoker.
Once the pork is done, I usually cool the butts in the
fridge for a few hours before I pull it into shreds. It’s just too hot right out of the oven. My cooking schedule usually goes like
this. I smoke the butts the day before I
‘m going to serve them, roast them in the oven over night, then put in the
fridge until dinner time. I then pull
them apart (making sure to mix in chopped pieces of the bark)
and reheat and
serve.
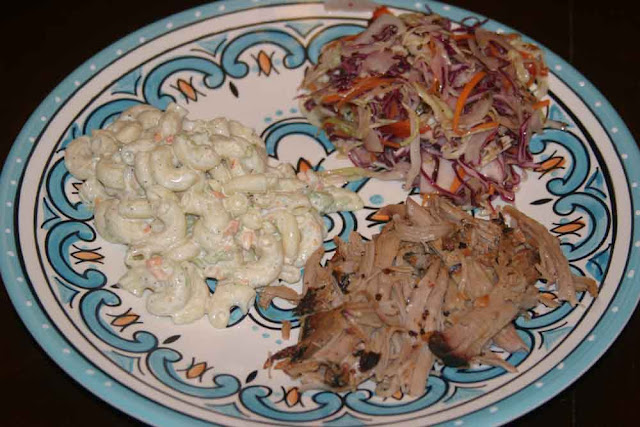
Here we’ve served some with traditional Hawaiian Macaroni
Salad and some of my wife’s coleslaw.
Replace the slaw with steamed rice, and you’ve got a traditional
Hawaiian plate lunch, served throughout the islands.
Until next time,
Aloha Oe!
Chris


