Sunday, January 26, 2014

Russian Dressing


Ah, Russian dressing.  Of all the salad dressings and sauces, there is perhaps more controversy surrounding this condiment than any other.  Where did it come from?  (News flash: It wasn’t Russia) What ingredients should be used in making it?  What color should it be?

Sadly, I don’t have all these answers.  The origins of Russian dressing are lost in the mists of time.  Sure, you’ll find stories on the internets and in foodie books, but they all seem to disagree with each other, so instead of repeating any of them here, I’ll just say that it most likely appeared sometime around the early Twentieth Century—A time I like to call the Golden Age of salad dressings.  Prior to this time we pretty much had oil and vinegar to dress a salad.  But suddenly, new and interesting dressings started popping up around the globe with great regularity.  Italian dressing was born, then French, Caesar, Green Goddess, Thousand Island.  All of these and many more popped up in the first few decades of the Twentieth.  


By the 50s, it was a regular smorgasbord of dressings available.  It truly was, ahem, the salad days, and a great time to be a dressing aficionado.  (I am, in fact, a dressing aficionado.  I keep over a dozen on hand at any given time.  But hey, variety is the spice of life, right?)

Speaking of Thousand Island, this dressing has a bit of a murky history as well, perhaps because it is muddled up with Russian dressing’s history.  


One was most likely an offshoot of the other, but no one is sure which came first.  (Though some will argue that they know)  The two are used interchangeably in many recipes (including Reuben Sandwiches), and they are quite similar in taste and appearance.

Now, if your only familiarity with Russian dressing is Aisle Seven of your local Piggly Wiggly, well then, you might say, “Chris, Russian and Thousand Island are different.  Look, here’s a picture!”


And to this I would say, yes, store-bought Russian dressing is somewhat different from T.I.  It has a deep red color as opposed to beige, and it tastes strongly of celery seed.  In fact, other than that celery seed flavor, it is quite close to Kraft’s Catalina French dressing.

But, I say to you--if you go to a real, honest Injun New York deli, this isn’t what you’re gonna get on your Ruben.  You’re gonna get something that looks like Thousand Island.  But, it’s gonna taste slightly different than the T.I. you’re used to.  And that’s because it’s not T.I., it’s Russian.  Confused?  Me too.  There are more Russian dressing recipes out there than you can shake a hammer and sickle at, and they’re all different.  But hey, I wanna make some Russian Dressing so I can make me a Reuben.  So, what to do?

Well, I decided that if anyone is an authority on the matter, it should be those good folks who run the aforementioned N.Y. Delis.  I remember the taste of their Russian, so I decided that was what I would shoot for when I mixed me up a batch. 

I started with about six different recipes, and tried them all.  All were interesting, and one was even a little bit weird.  It had beets in it, which I thought was cool (beets are so Russian-y, after all), but this one came out all pink, and it tasted a bit beet-y, so it wasn’t really like any R.D. I’d ever tasted.  I liked it, but it weren’t what I was looking for.

I finally came up with combining some of the recipes, taking what was common to all of them (like mayo, relish and horseradish) and then tweaking it a bit here and there.  In fact, speaking of the horseradish, I think this is the one ingredient that sets Russian apart from T.I.  Most Russians have horseradish, most T.I.s do not. 

But, enough with the histories and formalities.  Let’s go make us some dressing.  Some Russian dressing.  But unlike a Russian racehorse, we’ll take our time doing it. 


NY Deli-Style Russian Dressing

1 Cup Mayonnaise
1/3 Cup Heinz Chili Sauce
2 Tablespoons Sour Cream
2 Tablespoons Minced Cornichons (or Dill Pickle Relish)
2 Tablespoons Minced Onion
1 Tablespoon Prepared Horseradish
1 Tablespoon Celery Seed
1 Teaspoon Worcestershire Sauce
1/2 Teaspoon Lemon Juice
1/2 Teaspoon Paprika
1/2 Teaspoon Kosher Salt

Combine all the ingredients together in a bowl and mix thoroughly by hand with a whisk.  


Refrigerate for a couple hours to let the flavors meld.  That’s pretty much it.  Wow, I guess we didn’t need to take our time after all.  This really is the dressing to make if you’re in a rush. 

A few notes.  Use real mayonnaise and not Miracle Whip or such…they are not the same.  Make sure to use Heinz Chili Sauce.  


If you can’t find it for some reason, use ketchup rather than another brand of chili sauce.  The thing you’re going for with this condiment is a spicy tomato-y flavor, and that’s just what Heinz has, a spicier than ketchup ketchup flavor, with no actual chile heat.  Other sauces might have that heat, and while that might be nice for us chili-heads, it wouldn’t be apropos in our Russian Dressing. 

Also, try to find good cornichons for the recipe.  Maille brand from France are quite nice.  


Cornichons have a slightly different flavor than their more common cousin pickles, 


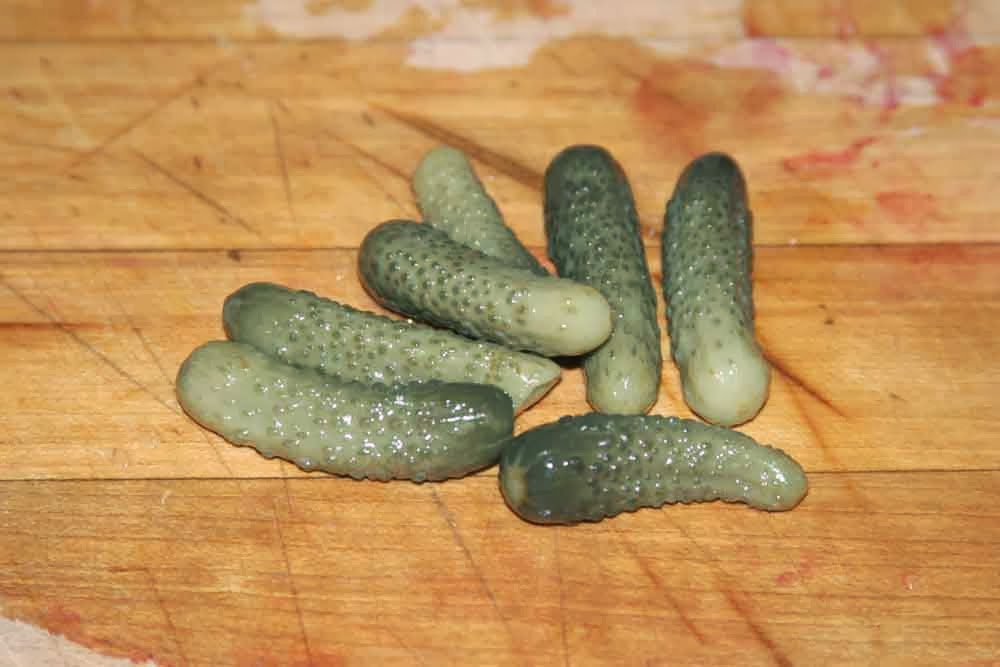
and I think they work much better in this dressing recipe than pickle relish does, which to me tends to be reminiscent of ball park hot dogs.  Finally, make sure you’re using celery seed, and not celery salt, which would make the dressing too salty.

That's about it, comrads!  


 Russian Dressing, chilled and ready to invade your taste buds!


Until next time,

Dasvidaniya!


Chris

Sunday, January 19, 2014

Sandwich Rye Bread


This month here at the Eat’n Man, we’re gonna work ourselves up to building the perfect Reuben Sandwich.  And were gonna do that by making all of the major components ourselves.  Well, okay, we’re not gonna corn our own beef, but we’re gonna do what good delicatessens do and make our own Russian Dressing and our own rye bread. 

I have to admit (full disclosure here) that growing up I was never a fan of rye bread.  But of course, growing up in Texas, I was in a delicatessen-starved region, thus I don’t believe I ever had an example of ‘good’ rye bread to try.  In fact, the first rye bread I ever tasted was on a sandwich I was served in a 1970s-era airport lounge here in Texas.  So, not to impugn 1970s-era airport lounges, but I can’t imagine they were bastions of gourmet goodness.  In fact, they probably rate just above school cafeteria cuisine. 

But, once I grew up and traveled to New York City and had me a Reuben Sandwich on some properly-made, properly-baked, just plain proper rye bread, I was hooked.  The bread was moist and slightly chewy, with a hint of an exotic taste that wasn’t overpowered by too much caraway.  And, that’s the bread that this recipe’ll yield ya.  It’s a slightly modified version of one from the nice folks over at King Arthur Flour.  Let’s get baking:

Sandwich Rye Bread: 

2 1/2 teaspoons instant yeast
3/4 cup water
1/4 cup vegetable oil
3/4 cup dill pickle juice
1 1/2 teaspoons salt
1 tablespoon sugar
1/2  teaspoon caraway seeds
1 1/2 teaspoons dill seeds
1 tablespoon yellow mustard seeds
3/4 cup instant mashed potato flakes
2 1/2 cups bread flour
1 1/3 cups pumpernickel flour

Dissolve the yeast in a couple ounces of the (lukewarm) water with a pinch of sugar. Allow to rest for 5-10 minutes.


Combine the dissolved yeast with the rest of the ingredients and mix until dough forms.  


Yes, that’s right.  There is instant mashed potato flakes in this.  And pickle juice.  Now, before you run me up on charges for having mashed potato flakes in the cupboard, I assure you I only use them in bread baking as a substitute for dedicated potato flour.  (they work fine for this).  I’m not using them to make my mashed potatoes.  You can read how to do that here.  Oh, and the pickle juice, it just adds a unique and exotic flavor that is right at home in this loaf. 

Knead the dough for a few minutes until it gets slightly stiff.  Probably about five minutes.

Place dough into a greased bowl, cover, and let the dough rise about one to one and a half hours.


Punch down the dough, then shape it into a log. Place the log in a lightly greased rectangular loaf pan. Press it to the edges of the pan, then flatten the top.


Cover the pan with greased plastic wrap and let the loaf to rise until it has risen about 1" to 1 1/2" over the edge of the pan, about 1 to 1 1/2 hours.


Preheat the oven to 350°F.

Using a lame (as pictured here) or a sharp knife cut slits in the top of the loaf about 1 to 1 1/2 inches apart. 


Bake for 20 minutes. Cover lightly with foil and bake for an additional 20 minutes. When done the bread will have turned golden brown and delightful.


Allow it to cool completely on a rack before slicing.


Until Next Time,

Hope you get a rise out of this one, 

Chris

Wednesday, December 25, 2013

Stuffin' Muffins


Stuffin’ Muffins

What’s the best thing about holiday stuffing (or dressing, as we call it here in Texas)?  It’s the crunchy, golden brown crust that forms on top.  At least, that’s my favorite part.  The gooey interior, not so much.  Solution:  Skip the dressing in a pan and make Stuffin’ Muffins.  You’ll expose more of the surface area of the stuffing, thus forming lots much heavenly crunch. 

Start with some nice stale bread. 


Cube it and utilize it in your favorite stuffing recipe


-


Don’t forget plenty of sage.  


Fresh if you have it, but the dry stuff will work fine for making stuffing.  I usually mix some of each. 

Fill muffin trays with the mixture.  


Bake at 400F for about 25-35 minutes, or until a beautiful, golden brown crust has formed on them.  Pop ‘em out and serve with your holiday turkey.  Don’t forget the gravy, of course. 


Until next time,

Nothing gets you stuffed like Stuffin’ Muffins!

Happy Holidays!

Chris


Tuesday, December 17, 2013

French Apple Almond Tart


Back in my single, living-in-an-apartment days, I’d usually celebrate the holidays at one of my sisters’ houses, and simply bring a side or dessert that I prepared in my tiny apartment kitchen.  But I was going gourmet even back then, so I tried to feature something that would show off my ‘Eatin’ Man’ aspirations.  I discovered this beautiful tart in the pages of a Bon Appétit Magazine back then.  It delighted me so much that I immediately went out and bought a tart pan, and I have been making it ever since for the holidays now and then.  It makes for a beautiful presentation, and the taste is just as great.

French Apple Almond Tart


For Crust

2 large egg yolks
2 tablespoons Calvados or brandy
1 1/4 cups all purpose flour
2 tablespoons sugar
1/4 teaspoon salt
9 tablespoons (1 stick plus 1 tablespoon) chilled unsalted butter, cut into 1/2 -inch pieces

For Filling

1 1/4 cups blanched slivered almonds
3/4 cup plus 2 tablespoons sugar
2 large eggs
3 tablespoons Calvados or brandy
1 teaspoon vanilla extract
1/2 teaspoon almond extract
1/4 teaspoon salt
6 tablespoons (3/4 stick) unsalted butter, room temperature
3 tart green apples, peeled, quartered, cored, cut into 1/8-inch-thick wedges
1/4 cup apricot preserves

Make crust:

Stir egg yolks and Calvados in small bowl to blend.  Calvados is an apple brandy made in the Normandy region of France.  You can use regular brandy if you must, but try to find real Calvados.  It has an intense apple flavor that can't be beat.  I won't hold it against you if you have a little shot (or two) of it while you're making the tart.   


Combine flour, sugar and salt in processor. Add butter; 


cut in, using on/off turns, until butter is size of small peas. 


With machine running, add yolk mixture. Process until large moist clumps form. Gather dough into ball; flatten into disk. Wrap dough in plastic; refrigerate until cold, about 1 hour. (Can be made 1 day ahead. Keep chilled. Let soften slightly before rolling out.)

Roll out dough on lightly floured surface to 14-inch round. 


-


Transfer to 11-inch-diameter tart pan with removable bottom. 

-

Fold overhang in and press, forming double-thick sides. 


Chill while making filling.

Make filling:

Combine almonds, 3/4 cup sugar, eggs, 1 tablespoon Calvados, extracts and salt in processor. Blend until soft paste forms. Add 4 tablespoons butter; blend 10 seconds. Spread in crust. 


-


Chill until firm, about 45 minutes.

Meanwhile, peel and slice your apples.  If you have one of these handy dandy slicers, it'll make quick work of the slicing.  


-


This slicer makes rather fat slices, so I further slice them down with a knife to about a quarter inch thickness on the fat side, tapered to paper thin on the other.  

Stir apples, 1 tablespoon Calvados and 1 tablespoon sugar in large bowl. Let stand 30 minutes.

Preheat oven to 400°F. Drain apples; overlap in concentric circles atop filling. 


Melt 2 tablespoons butter; brush over apples. 


Sprinkle with 1 tablespoon sugar.


Bake tart 15 minutes. Reduce temperature to 350°F. Bake until apples are tender, about 45 minutes. Transfer to rack. Stir preserves and 1 tablespoon Calvados in small saucepan over low heat until preserves melt. Strain into small bowl; brush over apples. 


Cool. 

 Next, display your tart prominently among the other desserts.  Then slice and serve.  Enjoy!


How do you like them apples?

Until next time, 

Happy Holidays!

Chris

Saturday, November 30, 2013

Stew


Ingredients

2 Lbs Beef, (Top Round or Chuck)
3 Tablespoons Butter
1 Onion, Diced
3 Carrots, sliced
2 Russet Potatoes, Cubed
14 oz Corn
14 oz Green Beans
8 oz Tomato Paste
3 Quarts Water
1 Tablespoon Granulated Garlic
1 Teaspoon Paprika
1 Dash Worcestershire Sauce
Salt
Pepper
Beef Bouillon Cube (Optional)


When I was a kid, my Mom’s cooking was my entire culinary world, with the occasional exception of a family dinner out to El Chico or better still, Curly’s Catfish Cabin, a little hole in the wall catfish joint on Caddo Lake.  (Back in the Seventies, hole in the wall catfish joints were all over the place.  Whatever happened to those?)

Oh well, I digress.  What I’m saying was that Mom made simple yet tasty fare that I loved, and this recipe was one of my favorites.  She called it simply ‘Stew;’ not ‘Beef Stew’ (though there was beef in it), not ‘Hobo Stew,’ (I’m pretty sure no hobos were involved in the making of her stew) and certainly not Brunswick Stew (I don’t think we even knew where Brunswick was back then, let alone New Brunswick).  No, it was simply stew, and it was a delightful orange -colored broth with chunks of beef (usually leftover roast from Sunday) and whatever vegetables were on hand (corn and green beans always seemed to make an appearance).   It was a warming dish served on cold autumn and winter nights, always with plenty of cornbread for sopping purposes.  

I can’t remember the last time I had a bowl of Mom’s stew that she herself had made.  When my sibs and I grew up and moved out, she slowly stopped making Sunday roasts, and thus the basis for stew was gone.  Sadly, she passed away without me ever thinking to ask her for her recipe.  I’ve been longing for this stew lately, so I consulted my sister, and she had a few thoughts, and with that, I went forth and tried to replicate Mom’s stew.  The result is close, but it’s not an exact match to the flavor I remember, but it was quite delicious, so I decided it was worthy of blogging.  I’ll probably continue to tweak it over the coming years. (Ed. Note:  I've retitled this post 1950's Housewife Stew in honor of Mom and to give it a more colorful name)


Melt Butter in a large pot or Dutch oven.  


When hot, brown the beef in the butter, 


in batches if necessary (do not crowd or you’ll steam the beef, not brown it) on all sides and reserve.  


Add the diced onion and cook until translucent, about eight 8-10 minutes, stirring occasionally.   


When the onions have cleared, add the paprika and Worcestershire sauce, stir and cook for another minute. 


Add water...


...and bring to a boil.  Return beef to pot...


...cover and let boil for a couple minutes.  


Reduce to a simmer and cook beef for an hour or so before you add anything else.  This will allow it to ‘stew’ and get tender.  After this time, add the carrots, potatoes, corn, green beans and tomato paste.  


Cook another 45 minutes to an hour on low heat.  Taste stew and adjust flavor as necessary with salt and pepper.  Add the bouillon cube if a bit more ‘beefy’ flavor is desired. 


Serve with some hot homemade cornbread for dipping (or sopping, as we like to say down here) purposes.


And so, that’s it.  This is certainly not the ‘fanciest’ stew recipe you’ll ever come across, but it’s a darn tasty one, reminiscent of my childhood.  I think I’ll keep it. 

Until next time,

Pass me another slice of cornbread!


Chris