Friday, July 30, 2010

Beer Brined Pork Loin Chops


As much as I love beer, you’d think that I loved cooking with it as well. But generally, the only cooking with beer I ever do involves me cooking some food, and drinking said beer. Unlike wine, I’m just not a huge lover of the flavor of beer cooked into foods.


However, I recently discovered this recipe for beer brined pork chops, and I just had to try it out. I was pleasantly surprised by the results. The flavor of the dark oatmeal stout married quite well with the molasses, and gave a hint of sweetness to the chops.

Before we begin, a word on brining. These days, a pig is bred to be a very lean animal, and that means has substantially less flavor than it did 30-40 years ago. Brining remedies that to a certain extent. During the brining process, the salt is slowly absorbed in the pork, taking with it the other flavors as well. This can produce some very tasty pork.

Beer Brined Pork Chops

2 bone in pork chops, cut 1½ inches thick.

1 3/4 cups water
1 cup stout or other dark beer
2 tablespoons coarse salt
2 tablespoons molasses
2 teaspoons coarsely cracked black pepper
4 cloves garlic, minced

Trim fat from chops. As you can see in the above photo, we used chops with some of the loin, and some of the tenderloin–a sort of T-bone or porterhouse style pork chop. Place chops in a resealable plastic bag and place in a shallow dish. Combine water, stout, salt, molasses, and garlic.  Here we've got a chance to show you another Pampered Chef gadget...the Garlic Press. 

Just place a clove of garlic into it, press, and voila, minced garlic, and the skin is left behind.  Simple. 
When you've mixed everything, stir until salt dissolves. Pour stout over chops. Refrigerate for 8 to 24 hours.


The next day (yes, you gotta make this one in advance) drain chops, discarding brine. Pat chops dry with paper towel. Sprinkle pepper over each chop and rub in with your fingers.

Fire up your charcoal grill, and arrange medium hot coals for indrect grilling, with a drip pan in the middle.  Here I've added a few chuncks of apple wood to partially smoke the chops as well. 

Place the chops over the drip pan and close the grill.  Ideally, you want to maintain about 300-350 in the grill, and the chops should take about 20-30 minutes. 

Mmmmm.  After about 20 minutes the chops are looking great, and taking on a nice color from the smoke.  It's here that I'll give my spiel for a meat thermometer.  If you're going to go to the trouble to cook a fine cut of meat like a steak or chop, why chance it.  Take the guesswork out of the equation and get an instant read meat thermometer.  That way, you can pull the meat off at the exact point of desired doneness, and not risk overcooking it.  

That being said, I'll stay on my soap box a little longer.  Most recipes call for cooking pork to 160 degrees, and while that may guarantee you a safe product, we find that pork done to this temp it way too dry.  I pull my pork off of the grill when it reaches 135 degrees, and then let it rest for 10 minutes or so.  It will continue to cook, and top out at 145-150, and be juicy and delicious, and perfectly safe too eat.  

Pull your pork at 135, at let it rest for ten minutes or so. 

Okay, stepping off the soapbox now.  Chops are done.  So lets serve them, perhaps with some apple sauce, and that, a fine meal, will make. 

Until next time,

Chris


Homemade Apple Sauce


You can’t have pork chops without apple sauce, and with all due respect to Alice from the Brady Bunch, just any old apple sauce won’t do. Sure, you can buy it in a jar, but that’s about as flavorless and exciting as baby food. In fact, it may well be baby food.
 
You need an apple sauce that is tart and spicy, something with character that can stand up to those inch thick pork chops that you’ve spent so much time brining and grilling. I think I’ve got just the ticket.


Homemade Apple Sauce

3 Granny Smith Apples
3 Gala Apples
2 Tablespoons Sugar
1 Tablespoon Cinnamon
1 Teaspoon Cardamom
1/3 Stick of Butter, cut into pats


Peel the apples. If you’ve been to way too many Pampered Chef parties like me, you’ve probably ended up with this gadget, the apple peeler. It actually works pretty well.

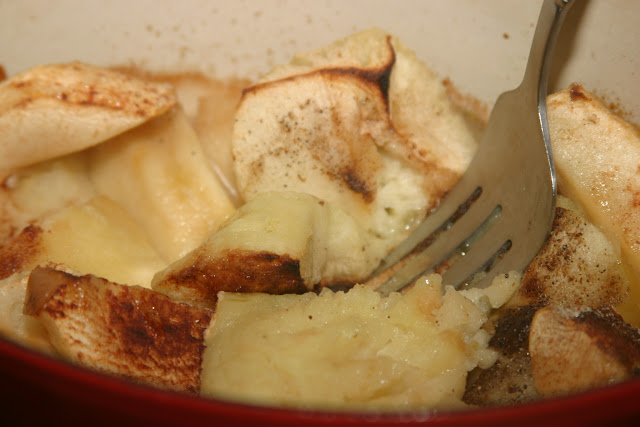
But peel ‘em however you want, and then cut ‘em into slices and place in an oven safe dish. Sprinkle sugar, cinnamon, and cardamom on top, then nestle the pats of butter amongst the apple slices. Put this in a 400 degree oven for 25-30 minutes, and then remove and mash with a fork.

Voila. Apple sauce. Some of the finest you’ve ever tasted. Believe me. Go ask Alice.


Until next time.

Chris.

Friday, July 23, 2010

Borscht


Borscht.  That name alone seems to strike fear in the hearts of American eaters, and conjure up visions of stocky Russian Babushka ladies or cold war terror.  Or at least school cafeteria terror, because sadly, this is the only way many Americans have been exposed to beets. Cold. Pickled. Beets. Plopped on your tray next to your hamburger helper or mystery meat. You hated beets then, and if you were served them the same way, you’d hate ‘em now. And I wouldn’t blame you. Pickled beets are about as exciting as a mouth full of sand. And just as tasty.

But please, I implore you, don’t let those school cafeteria beets or the Klingon sounding name jade you against trying this wonderful soup. You’ll be glad you did.
 
As you can see, Borscht is just a good veggie soup that features beets and fresh dill as its signature flavors.
 
I first discovered Borscht on a trip to Moscow for a hockey tournament. I wasn’t playing hockey, mind you...I’m a native Texan, and hockey is still a mystery to me. I was just there to video tape the games. In my spare time, I discovered I liked several things about Moscow. Cheap pilsner beer, vodka, pretty Russian girls with names like Svetlana, and Borscht.


It was a cold, frigid February, and the Moscva river was frozen over, and it felt like your breath would freeze in front of you. The first taste of Borscht in a Moscow restaurant was a warm, savory delight. I ordered a bowl any time we were dining out, and thankfully, it was always ever present. As soon as I got back home, I set about reverse engineering this wonderful soup, and after a few trials, I think I nailed it.


Borscht

2 to 3 potatoes, peeled and cubed into 1/2 inch cubes
3 to 4 carrots, peeled and sliced
1 large onion, diced
4 to 5 cloves garlic, crushed
4 large beets, peeled and shredded
42 oz (3 cans) beef broth
42 oz (3 cans) chicken broth
28 oz (2 cans) water
3 Roma tomatoes, peeled and diced
Sugar
Dill, fresh and dried
Salt and Pepper
Paprika

Red wine vinegar (optional)
Balsamic vinegar (optional)

Pride of Prague Spice (optional)
Sour Cream (optional)


Cube the potatoes and slice the carrots and place in a large stock pot. Add the beef and chicken broth, and then use one of the cans to measure in two cans of water. Dice your onion and add. Crush Garlic and add.

Next cut the tops off of and peel the beets.  Admire their ruby red color and how they resemble the tops of a Russian cathedral.  You could at this point dice them, but I have found if you have a shredder attachment on a food processor, it is best to run them through it. Not only to you extract more of the beet’s flavor and color, but it is just that much easier. (I’ve shredded ‘em with a hand grater, and it ain’t all that much fun)
Shredding beets the fun and fast way.  Below is the results:
When added to the soup pot, you can immediately see the bright red color start to infuse the liquid.
While this starts to simmer, peel and dice the Roma tomatoes and add them to the soup. Quick tip. A good way to make peeling the tomatoes easy is to start a small pan of water boiling. Add the tomatoes for about a minute, and then plunge them into ice water. Let sit for a minute, and then the peels will practically slip right off.

Bring the soup to a boil, and add some dried dill. Probably about a teaspoon if you are measuring. Reduce and let simmer for 20-30 minutes. At this point, add the sugar. I usually add about a tablespoon, then taste. The soup should taste savory, but with a hint of sweetness. I believe the beets we get here just aren’t as sweet as those grown in Russia, hence the addition of the table sugar. If you’re not picking up the sweetness, add a little more. Add a dash of salt, pepper and paprika. Just a dash...these flavors should not dominate. Also, I have a little spice blend called Pride of Prague spice...sort of my secret ingredient for this soup, I guess. Just add a dash if you have it, but if not, no worries, it’s not a major flavor component.  Also, if a little more tangy flavor is desired, I add a dash of red wine vinegar and/or a dash of balsamic vinegar, but those ingredients are not particularly traditional--just my little variation.


Let the soup simmer for ten minutes more, adding a little fresh dill at this point. Taste and make any spice adjustments as necessary. Serve it in a shallow bowl with a lip so that you can sprinkle some fresh dill around the edge. This looks pretty and provides extra dill for the diner to sweep into the soup as needed.
Also, Borscht is usually served with a dollop of sour cream in the middle. It really tastes best with the sour cream blended in, but I like to serve it with just the dollop in the middle, so the diner can enjoy the soup both ways. It turns a bright pink when you blend the sour cream in, making it look even weirder than it already does. But ah, the taste!  So Good!

Note, you’ll find many recipes that call for cabbage in Borscht. I didn’t see it this way in Moscow, so perhaps this is more of the Ukrainian way to do it. Not sure, but I tried it with cabbage once, and didn’t care for it nearly as much. It had an unpleasant ‘boiled cabbage’ flavor to it, so I chose to omit this ingredient, as did all the Russian chefs at the restaurants where we dined.

Well, hope you enjoy, and I’d love to hear what you think of this dish, if you try it out.

Until next time,

Na zdorovia

Chris

Sunday, July 18, 2010

Flashback to Tuscany - Veal Piccata


Here’s a little foodie flashback to last year.
The Place: Tuscany.
The Setting: Our Villa.
The Dish: Veal Piccata.

The wife and I were fortunate enough to spend a week in a villa just outside of Florence, in the Tuscan region of Italy last year.
 
 
One if the best features of staying in a villa was having our own kitchen to cook up a few delicacies from the locale produce we found around the area. And yes, I was taking pictures of my food even back then. Little did I know I’d have this blog one day on which to share them.

So, let’s set the scene. We had just spent the day driving from Verona to the villa, and it was getting late, twilight was setting in, and we were starved. We found a little grocery store that was still open (stores keep notoriously odd hours in Europe) and we grabbed a few items fast. They had some lovely scallops (thin slices) of veal, so we rang that up along with a few other trifles and necessities (i.e., wine) for the evening.

Note:  This isn’t the most perfect recipe for veal Piccata that I’ve ever found, but since we were in a hurry, and just had a few basic ingredients at hand, it is what we went for. It actually made for a very simple, yet very tasty little dish.


Veal Piccata

4 scallops of veal, about a half pound, sliced very thin
olive oil
butter
lemon juice
capers
white wine

Add olive oil to frying pan, and saute the veal scallops, in batches if necessary, over hight heat for about a minute a side.
 
Its best to get the oil nice and hot so that the veal browns fast and can be quickly removed without overcooking. I like mine on the rare side, so I really just give it a kiss of heat–about 30 seconds a side and it is usually perfect.
 
After the veal is cooked, deglaze the pan by adding the white wine (about a half cup) and stir to break up browned bits on the bottom of the pan. When wine has reduced by half, melt some butter and add capers to this, stirring so the butter doesn’t burn.
 
Reduce heat and stir in a little lemon juice, and then pour this sauce over the veal and serve.
 
 
Voila, a delish dish in minutes.
 
Here we served it with some nice pasta that the wife made, and our first night in Tuscany was complete:
 
Well, almost complete:
 
Here, The Eat'n Man enjoys some liquid dessert.
 
Until next time,
 
Arrivederci,
 
Chris

Tuesday, July 13, 2010

Chicken Breasts Portieri


Back in the days when I was just learning to cook, and just learning to be the 'ladies man' that I became in my latter, single days, I needed a simple yet tasty recipe that I could fix quick for a dinner date. Had to have time to uncork the wine, and set that candle lit table, after all. Well, I discovered that recipe in the form of Chicken Breasts Portieri. This delicious little Italian dish pleased back then, and it still pleases the wife, now that I am an old married man.

I’ve been wanting to share this recipe on the blog since I first started it. Not only is it one of my favorite dishes, but it is one that I haven’t seen anywhere else but in the cheap little paperback Italian cookbook that I once used when trying to impress the ladies with my kitchen prowess. Now, many many years later, I have a multitude of Italian cookbooks, and have read many more. But, I have never seen this recipe in any of them. The name doesn’t even come up on an internet search, so it definitely isn’t some classic Italian dish like Chicken Cacciatore, or Lasagna. My knowledge of it I owe solely to the Nitty Gritty Italian cookbook. And now, so do you.


Chicken Breasts Portieri

2 chicken breasts, boned and skinned
½ cup flour
½ stick butter
3 tablespoons olive oil
½ cup marsala wine
½ cup water
1 large chicken bouillon cube
½ lb mushrooms, sliced
½ lb mozzarella, shredded
½ oz capers

Coat chicken breasts with flour. Place butter and olive oil in a pan over medium heat. When butter has melted, add chicken and cook until lightly browned, about 5-7 minutes.


Remove from the pan and arrange in a baking dish. Pour the wine in the skillet and stir to loosen browned bits.


Add water and bouillon cube. Cook down until sauce thickens. Pour the sauce over the chicken breasts.


Layer mushrooms over the saucy breasts. (heh heh heh)  Sprinkle shredded cheese over all of this, and then sprinkle some capers on top of that.


Bake at 450F for 10-15 minutes, until the cheese is melted and starts to turn golden brown on top.


And voila (or whatever it is the Italians say), there you have it...a nice little tasty dish fit for a romantic dinner with your significant other. Just don’t forget the wine and candlelight.


Here we've served it with some Hobo Pack Green Beans with Hearts of Palm.  Salute,

Chris
 
 
PS.  If anyone has every heard of this dish, I'd love to know.  I really did try to research it, and could find nothing.  I couldn't even find out what 'Portieri' means, other than it was the name of an Italian Football team, and lots of Italian last names.  So maybe this dish is just named after the person who created it, and Portieri doesn't mean anything.  Sort of like how Oyster's Rockafeller has nothing to do with 'rocks' or 'fellers,' it was just named after a rich guy. 
 
C
 

Saturday, July 10, 2010

Stone Fired Pizza


They say the hamburger is the number one fast food item eaten in America today, and I’ll begrudgingly admit that they are probably right. But I think it ought to be pizza. Pizza is delicious.  Pizza is ubiquitous. And there's so many ways to get a pizza that you'd think it were some sort of necessity.  There’s dine in, carry out, delivery, frozen, fresh, thick crust, thin crust, stuffed crust, deep dish, Chicago style, New York style, hand tossed, pizza dogs, pizza pretzels, and...well, you get the point.

But whatever happened to good old homemade pizza? And I don’t mean those cute little Chef Boyardee boxes we loved as kids. I mean good ole, make your sauce, make your dough, roll it out, pop it in the oven homemade pizza. Well, thanks to the folks over at The Pizza Forum, I learned a few tips and tricks to make a top notch pizza at home.

First, let’s make the dough. You should do this at least 8-12 hours before you are going to make your pizza, so like, say...in the morning. But if you’re mornings are either the rush off to work variety, or the sleep in late variety, you can make your dough the night before...and it will be better!  This is one of the first tips I learned in reading up on good pizza making. Dough needs time to rise, but also age a little bit, so that it develops some flavor.  Most pizza joints worthy of their pepperoni will make their dough the night before, store it in a refrigerated room, and then pull it out in the morning and let it rise. You can do a similar process at home.

Pizza Dough

3-3½ Cups white flour
1 package dry bread yeast
1 cup lukewarm water
1 tsp salt
a pinch of sugar

If you’re using a mixer with a dough hook, add flour and salt to your mixer, stir, and then with the mixer running, slowly add your water with the yeast. Let the mixer knead the dough for about ten minutes.

If you don’t have a mixer with dough hook...don’t worry you don’t ‘knead’ it. (har har har). Just add the flour slowly to the yeast water until about two thirds of the flour is mixed, then knead by hand until the rest of the flour is worked in. Continue to knead for about ten minutes, adding flour if the mixture is still too sticky.

When you're finished, place dough in a bowl, and you should have something that looks about like this:


After a couple hours, it will have risen, and look like this (it's a pizza dough miracle!):


Punch the dough down and knead it for a minute or two, and let it rise again for a couple more hours. I know, this seems redundant, but multiple risings allow the yeast to work longer, consuming more of the starch in the dough, and producing more flavor. You’ll thank yourself later for all this extra work.

So, while the dough is doing its thing, let's make the sauce.

We don’t have to get too fancy here and go grinding up fresh tomatoes. You can make a top notch sauce from canned tomato products, olive oil and herbs. (not that you can’t drop some fresh tomato slices on your pizza as well...it’s your pizza...put what you want on it!)


Pizza Sauce

1 can tomato puree.
1 can tomato paste
2 tablespoons olive oil
3 cloves garlic
1 tablespoon oregano
1 teaspoon marjoram
1 teaspoon balsamic vinegar
fresh basil and oregano
salt to taste.


Heat the tomato puree, paste and olive oil over medium heat. Mince the garlic cloves and add. Add the oregano, marjoram and minced fresh basil and stir. Add the balsamic vinegar. Add a bit of salt to taste. If the sauce seems too thick for your liking, add a bit more olive oil to thin. Note, this is just one recipe of a myriad of sauce recipes out there. I like this one as it makes a thick, tangy sauce with a lot of flavor, but it is relatively simple to make.

Now, it's late afternoon, the dough and sauce are ready, we've sipped a nice chianti, so let's make some pies.

Divide the dough in two and roll out into two roughly circular pies. At this point you may be asking, should I be rolling it out into a greased pizza pan? Well...no. I prefer to use a pizza stone (hence the 'Stone Fired Pizza' moniker on this article).  These stones add another secret ingredient we need for great homemade pizza:  Heat. You see, those fancy pizza joints we all love have special ovens that get hot...real hot. Like 800 degrees hot. And we just can’t replicate that at home. But we can get close, if we get ourselves a pizza stone.

Pizza stones, or baking stones, are available at most stores like Target or similar, or you can drop a few more bucks at a gourmet store and get one that is said won’t crack on you. I’ve had the same Target quality stone for nigh on fifteen years now, and it has yet to crack.

So what we’re gonna do with our stone is get it really, really hot, and then put our pizza directly onto it. This gets the bottom of the pie cooking immediately, while the hot oven does the trick on the other side...the one with all the toppings that we’ll get to in a moment. So I simply roll out my dough only a cutting board, and then make the pie, and move it too the stone. And to get that pizza pie directly onto the stone, we need specialty item number two: A peel.

A peel is just a wide wooden paddle that you see the guys at pizza joints using to slide pies into and out of the ovens. You can have one in your kitchen too...they’re surprisingly affordable. In fact, you can even go the extra mile, and get something called the super peel, which adds a sort of cloth conveyer system onto the peel. It’s really ingenious. The wife got me one for V-day, and I love it. Here’s a little video from the folks that make it, showing how it works.


So, where were we?  Ah yes, let's make those pies and get 'em in the oven.  I'm not going to spend a lot of time on topping here, because you know what you like.  For my first one today, I went for a standard mozzarella cheese with pepperoni, black olives and some capers.


And then let's pop it onto the stone and into the oven.

I use a 500 degree oven (set on bake...not broil!), which is much hotter than most recipes call for, but since we are baking on the stone, we want the top to cook as fast as the bottom, and it is this quick, hot, stone fired method that will best replicate the flavors of a traditional pizza oven.  Just be careful, the pies will cook very fast, so don't leave them unattended to go sip another glass of that chianti.   Check your oven frequently, and when the toppings are melted and begin to get nice little golden brown spots (what the pizza gurus call 'leopard spots') on them, you can pull the pie out, or let it go just a little longer.  (I like the tops of mine dark). 

Let the pie sit for a few minutes, then slice and serve. Hopefully, you will dig these homemade pies as much as we did. We usually do several at a time, one after the other.  They make great leftovers.  Here's a few pics of some of our finished work:


Hope I've made your mouth water sufficiently.  Now go bake a pizza!

Salute!

Chris

Tuesday, July 6, 2010

Stir Fry - On the Grill - Kung Pao Chicken


Shhhh, I'm about to tell you the proverbial Ancient Chinese Secret, and no, it isn't Calgon. This is the secret to great stir fry were talking about--and that secret is, a real, honest to goodness Wok. We found you just can't do decent stir fry in a skillet--well, decent maybe, but not outstanding. You need a real wok for this, preferably a good cast iron or carbon steel one from China. It is the unique curved shape of the wok that produces the best stir frys.  Juices run to the bottom where they are super heated to become steam, while larger bits of food will cling to the sides (particularly with a hand hammered wok) where they crisp to a nice golden brown.

But wait, there's more. The key to getting that authentic stir fry flavor (what the Chinese call Wok Hei, or 'Breath of the Wok') is to get your wok really hot, and it is just hard to pull that off on an indoor stove, particularly if it is electric.
 
So what to do? Well, fire up the ole charcoal grill, nestle said wok down amongst the coals, and soon you'll have a wok that's hotter than the head of Halliburton in Hell, ready for your stir frying pleasure.


As you can see, an 18 inch cast iron Wok fits neatly into the brazier of a standard Weber kettle grill. Don't be alarmed that it's sitting right on the coals...this is what it takes to get that baby super hot...the kind of heat we need for 'Wok Hei.'   I got the idea for this from a picture I saw of a man in China cooking with a wok sitting on top of an old metal paint can full of coals.  Seemed like a cool way to wok.  The Weber grill makes it a little easier, though. 
 
I use about half the amount of charcoal that I would normally use for grilling.  I start it in a chimney, then spread it out in a circle so that there is a little 'bowl of coals' for the wok to nestle snugly upon.  After five minutes or so, we check the temperature:
 
 
Using the infrared thermometer, we can check the temp from a safe distance.  908 degrees Fahrenheit at wok center..yowie, that's hot.  Keep your arms and legs clear of the grill, kids.
 
So, now that we've got a hot assed Wok...lets cook something. How about:
 
Kung Pao Chicken:
 
1 lb Chicken Breast, cut into cubes.
Soy Sauce
Rice Wine or Mirin
Cornstarch
Sugar
Chicken Bouillon Cube, disolved in 1/4 cup water
Chinkiang Vinegar (balsalmic can be substituted)
3/4 cup dry roasted peanuts
peanut oil
minced garlic
minced ginger
diced dried red chilis
2 large bell peppers, cubed
1 large onion, minced (scallions are traditional, but we like the onion better)
 
Long before you've fired up that grill and heated the wok, you'll want to prep all your ingredients.  Start by cutting the chicken into nice sized cubes as shown below:
 
Mix a few tablespoons soy sauce with one tablespoon of the rice wine, a teaspoon of corn starch, and a teaspoon of sugar.  Marinate the chicken in this mixture for at least 30 minutes.  Meanwhile, mix the bouillon with 2 teaspoons of the vinegar, a tablespoon soy sauce, and a tablespoon rice wine.  Set aside.   
 
Since we'll be moving from the kitchen to the great out of doors, I find it best to not only prep all the ingredients ahead of time (a must with stir frying, even in the kitchen) but also to arrange them into a nice mise en place on a large tray that I can carry out to the grill, like the one shown below.
 
Pictured above:  Marinated Chicken, Bell Peppers, Onions (with a few scallions added), diced red peppers, minced ginger and garlic, peanuts, and the bouillon mixture.  Here we go:
 
When the wok is hot, swirl about one tablespoon of the peanut oil into it.  Add about half the garlic and ginger, and stir fry for about ten seconds.  Then carefully add your chicken mixture, spreading it evenly in the wok. 
 
Cook undisturbed for about a minute, then using a metal spatula, stir fry for one minute, or until the chicken is browned on all sides, but not cooked completely through.  Transfer to a plate or other container. (I use another one of our woks). 
 
Now, add another tablespoon of peanut oil, and the rest of the garlic and ginger.  Add the bell peppers and stir fry for a minute or so.  Add the onions and give them a minute of stry frying as well. 
 
Return the chicken to the wok, add the bouillon mixture, and stir fry until the chicken is just cooked through...about two minutes or so.  Add the peanuts and stir fry another thirty seconds or so. 
 
Voila...you've just made Kung Pao chicken:

Looks pretty, huh?  Tastes even better.  Serve with some rice, and you've got a nice meal with a far east flavor.
 
A few Tips:
 
When you slice your dried red peppers, use kitchen shears if you have them...makes the job a bit easier.  Also, you can leave the seeds in, like I've done below, if you like your Kung Pao to have some extra heat to it.
 
 
Also, if you don't wish to brave the outdoor grill, this recipe can be made in your kitchen...you just may have to lengthen the frying times a bit, depending on how hot you get your wok or skillet. 
 
If you do stry fry on the grill, use extreme caution...we are talking open flames here.  It is probably best to wear gloves while you're working, and be extremely careful when you add the oil to the wok.  I use peanut oil for stir frying, as it has a high smoke point and usually won't burn.  But, even with peanut oil, if the wok is extremely hot, you can get a brief flame up.  Nothing too dangerous, just be ready for it.  If it does happen, it should go out in a second or two, but it if doesn't, have the lid to your grill handy, and cover it for a few seconds.  Then proceed as normal. 
 
Flame on!  Here I've had a little flare up just after I added the chicken.  It went out after a couple seconds.  But I just wanted y'all to see that it can happen, so keep the grill away from covered awnings, and be ready with the lid if you need it.  Also, be careful when you swirl the oil in.  Do it toward the center of the wok, as you won't want to splash any down in the coals.  Also, a note on wok size.  I wouldn't use anything smaller than an 18 inch wok in a full sized Weber or similar grill.  You don't want too much space between the wok and the walls of the grill, as you'll get too much heat escaping there...less heat for the wok, and more for you to deal with as you stir fry.  If you have a smaller wok, you can use a smaller grill.  Our 14 inch wok fits nicely on the little Weber Smokey Joe grill we have:
 

So of course this means:
 
Two woks at the same time!  The smaller wok makes a nice 'side burner' for another dish.  We'll cover that one in a future post.  Until then, happy woking!
 
Banzai,
 
Chris